
How to Take Pictures of Your Car
by Paul Economou
stealth_bombaz@hotmail.com
Page 6
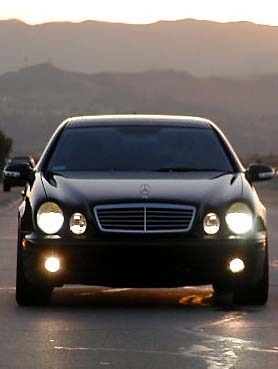
C. Cropping. Lets just say, that you got a great shot, but there is just so much going on in the background, or there are objects in the way of the picture, you just need to get rid of them. You can get rid of them by cropping! Cropping also can be used to put the rule of thirds into effect (which I'll discuss later).
Here is an example of cropping out some of the objects in the picture I've been editing. As you can see, it cleans it up a bit and completely changes the mood of the picture.
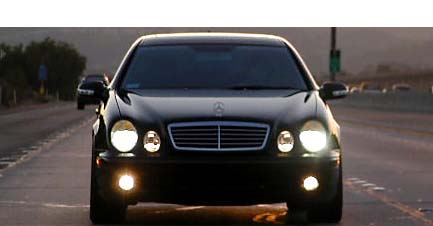
I'm far from being skilled at Photoshop, but here is an example of getting rid of the carpool lane sign that seems to detract from the quality of the picture. With the right skills this would look seamless.
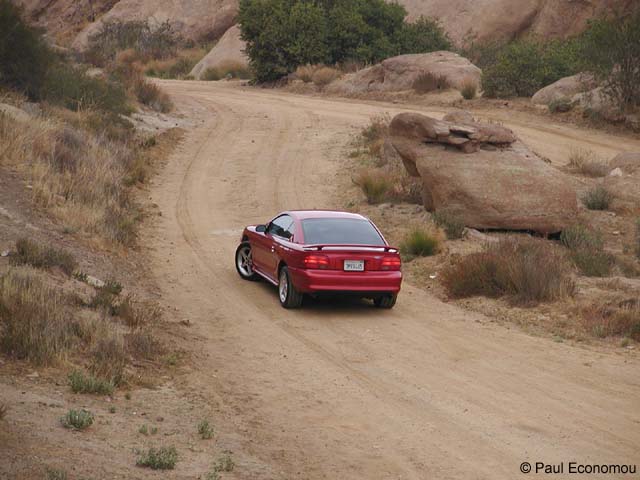
8. The Rule of Thirds. This isn't a very important factor in basic photography of your car, but once you get relatively advanced, you can put this into practice and get some interesting results. The rule of thirds goes against common logic that would make someone think the picture is best if the main subject is in the very middle of the picture, but in some cases, by doing this it causes the picture to lack tension and movement, which is what grabs most peoples' attention. The way to apply this would be to imagine lines dividing the picture up into thirds, vertically and horizontally. By placing the main object on one of these intersections, depending on the picture it can give you the picture a completely different feeling.
Centered picture:
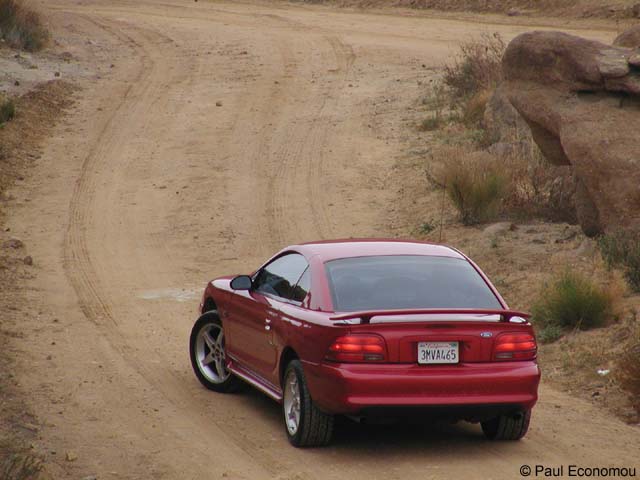
Zoomed and "moved" car into the bottom right intersection of lines. I don't think zooming in helped, but needless to say, the overall quality of the picture was improved.
Some more basic rules of thumb. After a closer inspection of the
write up, there's just a few more things I'd like to point out.
A. Reflections from trees and other objects are bad, to reduce these use a Circular
Polarizing filter (assuming your camera is autofocus), and don't park your car
under trees.
B. Turn your wheels towards the camera. Some people forget to turn the wheels towards the camera, and end up turning them away. People would much rather see your wheels than your tires, I'm sure. Be sure not to turn your wheels too much, just a little bit is fine.
C. If you park your car in a parking lot, Ideally avoid painted lines, as they will be a distracting part of the foreground and background.
D. Take pictures at the highest JPEG resolution possible. Don't
make the same mistake I did and take your favorite picture ever, then realize
its only a 640x480 sized picture that would barely make a quality 5x7 sized
print.
E. Avoid Bright overhead sunlight, it will cause harsh glare and harsh shadows. If you do end up having to shoot in bright overhead sunlight, use a Lens Shade, and a UV Filter/Circular Polarizing filter if at all possible. Also, use fill flash to fill in the shadows that are cast by the overhead sun.
Hopefully this write-up was helpful. I know there has been a demand for it,
so I decided that I'd sit around and spend the afternoon giving my best attempt
at a nice complete write up on how you can take some stunning pictures of your
cars. Now go outside, wash your cars, find a good location, and start taking
some great pictures!